
I've been working on my Nintendo 64 off and on for a few weeks. I have added a few mods to it including a back-light on the logo, a fan on the top, and some various LED's. I plan on doing a few more mods before calling it finished. But here I'm showing my attempt at a paint job and side lighting. The paint job didn't turn out how I wanted.
Click "Read More" to see the rest.


Sanding the bondo and case. You really have to be careful using an electric sander to do this. If you stay in one area for any significant time the plastic will start to melt. I sanded down all areas I planned on painting. The case, the buttons, controller ports, feet, and cartridge flaps. You can see that the bondo, even after sanding, doesn't look good. At this point I knew I was going to need to redo the bondo and paint. but I wanted to give it the first coat anyway to see how it might turn out.


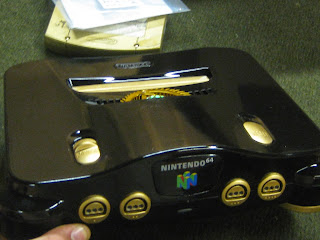
I went with gold and black because the fan I installed was a shiny gold. The pieces I painted gold actually turned out really well. The black on the other hand looks terrible. It will take some more sanding and more bondo to finally get this thing looking smooth. If anyone has any suggestions on what to use to smooth this finish out and cover up the blotchy bondo job I'm all ears.


These pictures don't really do it justice. I'm going to add 6 more orange LED's to the fan to give it a better ambiance. I may even put a plastic film disc inside to make it glow instead of being able to see the tops of the LED's. The logo looks 100% better in person. I need to find a good way to mount the blue LED's. They look great but right now they are just sitting there.

UPDATE 10-19-13

I sanded the bondo back down and set it up to be painted again. This time instead of simply placing the case on the stool I used cookies. Not to be confused with chocolate chip. the cookies basically keep what your painting off the table.

First coat of paint by itself covered the bondo, and at a close look you cant tell the difference.

Second Coat.

Third and final coat after drying and assembly. It looks AMAZING!

Here it is turned on in my entertainment center.
Future plans for this include an Everdrive 64 Flashcart to play ROMs of 64 and SNES games, overclocking to get better frame rates(although it doesn't seem to make very much difference), and adding RGB video instead of the RCA that comes out right now. Before I do the RGB mod though, I may just mod the cable and make it S-Video. It is a pretty quick hack considering the cable already has the pins for it.
Thanks for reading. Hope you enjoyed.
Send me your suggestions at David.Carver@hotmail.com
Don't forget to comment.
No comments:
Post a Comment